
Showing posts with label dies. Show all posts
Showing posts with label dies. Show all posts
Monday, July 7, 2014
Blossom Party Die
I'm having just too much fun lately! So terrific to feel good enough to create again. This beauty was created using Rich Razzleberry and White. Little Leaves Sizzlets were cut in Old Olive. Flowers were made using SU Blossom Party die. White edge was created using Adorning Accents Edgelit and matching embossing folder. On my next one, I will try sponging a little color onto the flower petals to give it more depth, and maybe discretely place a few drops of Glossy Accents for dew drops onto the petals. Small flower was created with the Itty Bitty Punch. Nothing was dimensionaled. Rhinestone bling gave a finishing touch.
Wednesday, September 4, 2013
Friendship Class Card

Friday, May 10, 2013


Thursday, March 14, 2013
Wreath Card

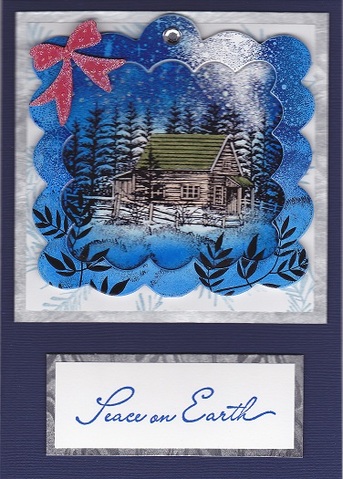
Tuesday, December 4, 2012
Christmas Stampscape Class
Have been trying to get into this class for the past two years. So happy I finally got in, now I just have to put what I learned to good use. These are the three cards that we made in class. I especially like the ornament shape cut-out. Bought 2 sets of ornament Dies last year and don't think any are this big. Pretty simple really. Use your BigShot & your Die to cut the desired shape into your basic card stock. Using the shape as a guide, build your scene on glossy paper. Color it with Memento, and/or Markers. Add little embellishments such as the bow, ribbon, angel or presents and mount onto cardstocks. Ken is a great teacher and works magic with the scenescape stamps.


Wednesday, November 28, 2012
The Pears of Thanksgiving
Hope you had a verry blessed Thanksgiving. By now everyone has received their cards and it is safe to post them.


As you can see, each card was slightly different. These are just 4 of the many that I made. To start, I either downloaded or created my background paper. The Filigree is a special Memory Box die called Embedded Pear, that I found at the convention. I bought it because I thought it would make a beautiful corner piece, but as I checked out the gal told me it was made to fit their pear die. How silly, thought I - who would ever do that. Then I saw a couple samples of work done with the two dies combined and stopped thinking it was such a silly idea. Since I had not purchased the Pear Die at the show, I had to recreate the proper size and proportions and make a template and again create or download my papers. Use the template to make the pear, cut it out, sponge on different colors to create shading and realism. I cut the filigree from different shades of brown. Made a leaf and stem and then assembled everything. The last step was putting on the bling. I was going to use 'diamonds' but found these coppery multi-color pieces in my drawer and thought they were perfect for the coloring on the card. It was fun and challenging, but among other things I am thankful that I have the time to play and create that which is in my mind, not to mention my thankfulness for all the 'toys' that I use.


As you can see, each card was slightly different. These are just 4 of the many that I made. To start, I either downloaded or created my background paper. The Filigree is a special Memory Box die called Embedded Pear, that I found at the convention. I bought it because I thought it would make a beautiful corner piece, but as I checked out the gal told me it was made to fit their pear die. How silly, thought I - who would ever do that. Then I saw a couple samples of work done with the two dies combined and stopped thinking it was such a silly idea. Since I had not purchased the Pear Die at the show, I had to recreate the proper size and proportions and make a template and again create or download my papers. Use the template to make the pear, cut it out, sponge on different colors to create shading and realism. I cut the filigree from different shades of brown. Made a leaf and stem and then assembled everything. The last step was putting on the bling. I was going to use 'diamonds' but found these coppery multi-color pieces in my drawer and thought they were perfect for the coloring on the card. It was fun and challenging, but among other things I am thankful that I have the time to play and create that which is in my mind, not to mention my thankfulness for all the 'toys' that I use.
Saturday, September 1, 2012
Froggie went a fishin"

Take a close look - he's so ugly he's cute! The inside says "I may be green and slimey, but I'm all yours". Took me awhile to figure out how to cut the two ovals so that everything fit together in the end. The frog is sitting on a rock at the waters edge. Grasses and plants are die cuts and are layered behind and in front of him. The butterflies are all Stampin Up embosslits and the fishing line is my Home Made Twine. Sometimes I just have too much fun! This card can be used for a boys birthday, a valentine, Get Well, etc. Or for a September card - don't look Jean! It's a cute, versatile card.
Sunday, January 22, 2012
I'm having too much fun...
with my new Window Die. If you can't be at the beach, a peaceful winter scene will do.
 This scene was taken from a piece of scrapbook paper. The window was sponged with Caramel and popped up on the wallpaper background with dimensionals. That's it - easy peasy.
 A couple of bright red cardinals in the white birch trees, with a soft snow sky behind. A smidgeon of Caramel sponged on the window which was then highlighted with the lightest greys. Acetate made window panes and then it was placed flat against the wallpaper background.
My beach house (in my dreams)
 My dream was always to live on the water - a tropical island would do very find thank you! This looks out from the North side of the house. So peaceful looking at the Palm Trees on the nearby island. The window was sponged in Caramel and has acetate panes, placed flat against the wallpaper background.
 Looking the other direction, at night, we have a totally difference scenescape creation. Nothing beats the sound of waves gently lapping the shore.
Flower Garden - Outside Looking In
 There are slight differences between these two windows. They are cut with the PoppyStamps Grand Madison Die and are shaded lightly with Copics C1, C0, & 0. There are no window panes, and the windows are popped up using Dimensionals. This allows the vase of flowers on the table, just below the window sill, to move freely and provides good depth.
 The fence and curtains are done with Martha Stewart punches. Notice the slight difference in the curtain patterns. The garden foliage is again using the MS Pine Branch punch - this time cutting them into smaller pieces to create the garden.
Flowers were made using either a tiny flower punch, or a regular hole punch. Both kinds of flowers are "cupped", again providing depth and dimension. The centers are created using a 1/16" hole punch - teeny, tiny and hard to work with.
Deer in the yard...
 Windows in two different rooms give you very different scenes to look at. Both are on fairly dark, rich, wallpaper. This window scenescape was done in fall and shows the deer down by the water. The window is sponged lightly with Caramel, while acetate makes the window panes for this one.
 The one in winter is off deer grazing in the yard, fairly close to the house. The scene is colored with Copics, and the window has soft subtle CO, C1, & O Copics to accentuate the markings on the window itself. Again with Crystal Lacquer for the window panes. This window has a pine sprig on top, made using a Martha Stewart Pine Branch Punch. The Berries are made using the 1/16th" hole punch. So tiny they are hard to work with.
WINDOWS...
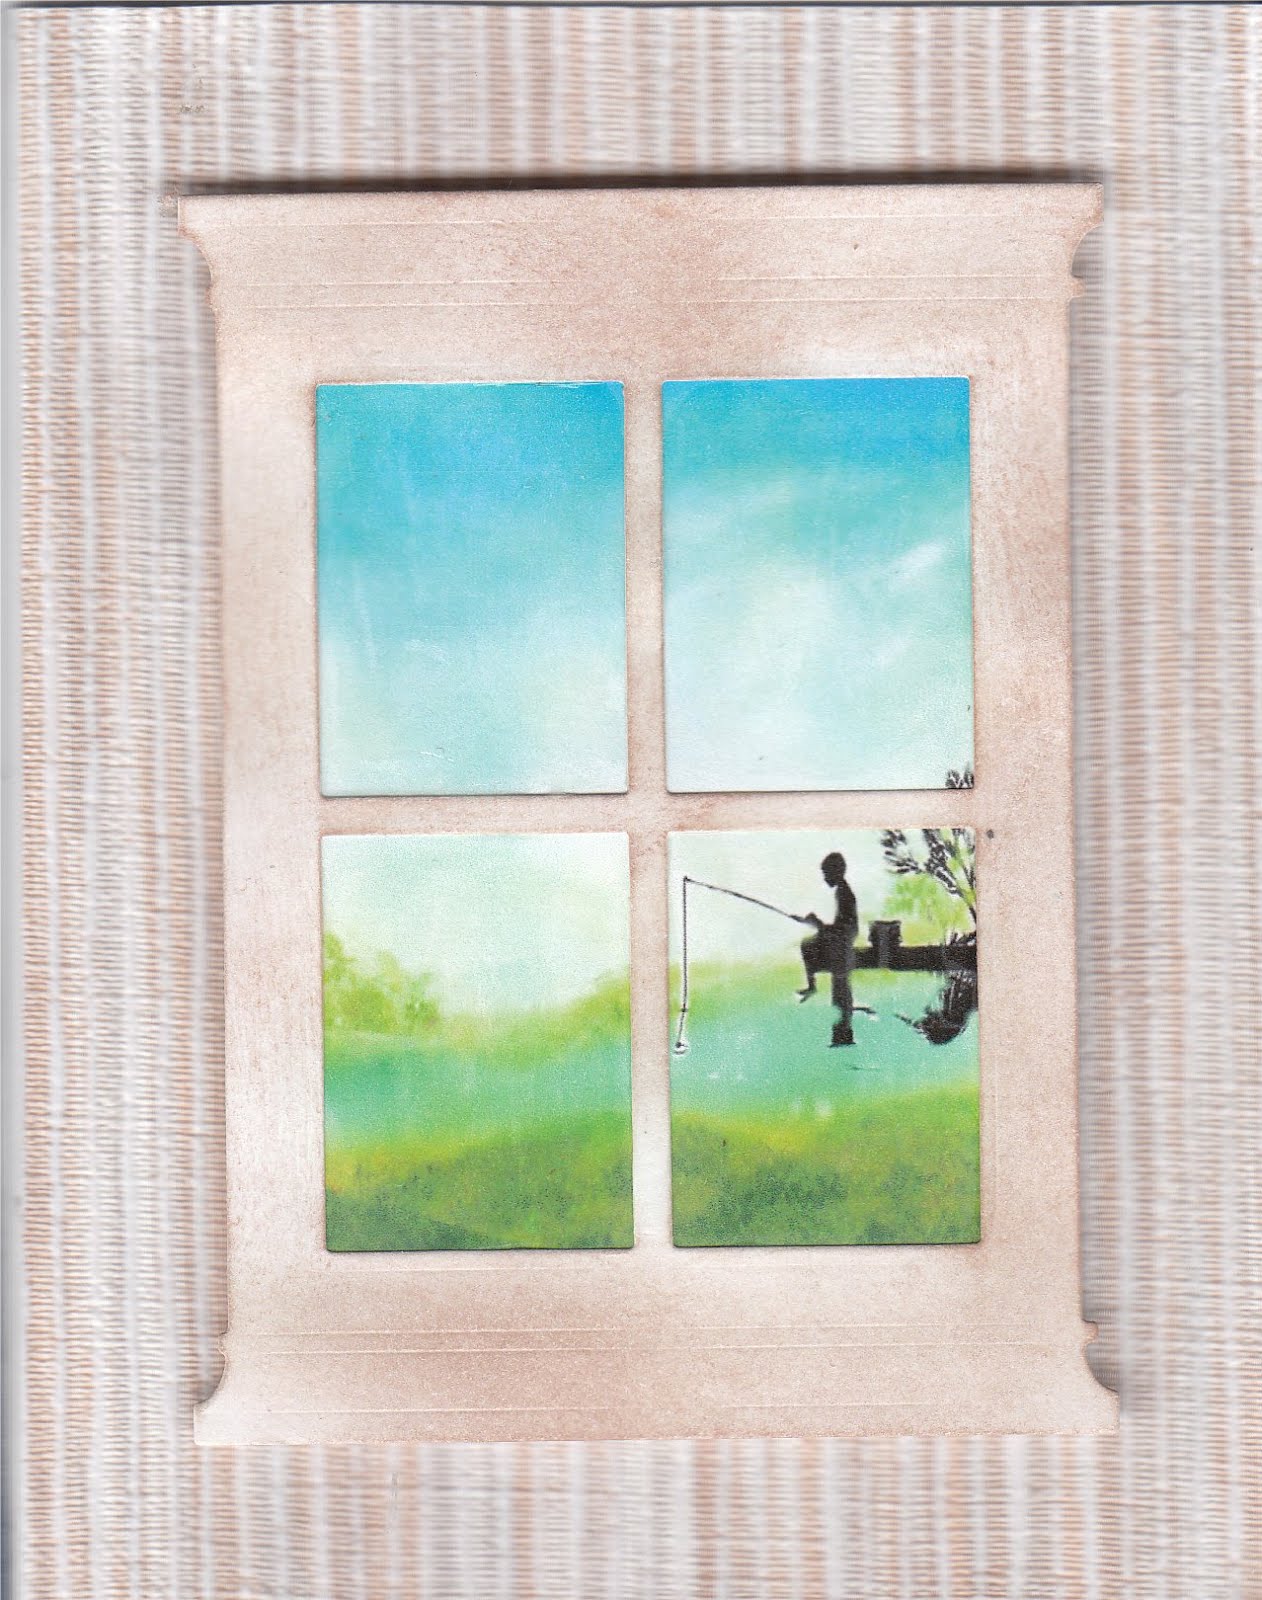 In my dreams, this is my grandson fishing on the dock in our yard. The window was sponged lightly with Caramel and popped up on the wallpaper background with dimensionals. Crystal Lacquer smeared across the image with my finger made the window panes.
I have a new Die and am having too much fun. Pretend these are all rooms of my house (or my summer cottage), and you'll see what amazing scenery I have.
Monday, August 23, 2010
Anniversary Card for Husband
 Since my husband never reads my blogs and can't quit figure out what a blog is and why I would have one, it is safe to post this creation that I just finished. I scanned it against a colored background so you could see that I have finally mastered the corner punching with the scallops - so simple once you know how. If anybody needs help, just let me know - be happy to share my new found knowledge with you. This was real fun to learn to make. The bird is punched from the SU 3 piece bird punch. Punch several of them in different colors, cut them apart and assemble the bird, sponging edges as you go. The branches are from the long SU die Birds and Branches. The hearts are punched from the SU 3 heart punch, the pink one cut down a wee bit to provide for a red margin and then stamped in red with a small part of a flourish stamp. The Text is SU. Hope you enjoy my creation
Subscribe to:
Posts (Atom)